Showing posts with label ribbon. Show all posts
Showing posts with label ribbon. Show all posts
Tuesday, September 3, 2013
Friday, August 30, 2013
MS Dynamics CRM 2011 - EnableRule, ValueRule, OrRule & CustomRule in Ribbon Customizations
ValueRule - Enable the Custom button only when a specific filed on the form has a value.
For example, if the 'Email' field has value then the custom will be enable otherwise it will disable.
/RibbonDiffXml/RuleDefinitions/EnableRules/EnableRule/
EnableRule for mulitple fields, use 'OrRule', for example
EnableRule only works with Equal(=) condition, for different conditions (not equal) use 'InvertResult' attribute.
Refer the above id in the following location /RibbonDiffXml/CommandDefinitions/CommandDefinition/EnableRules
CustomRule - call a javascript function based on the result.
http://msdn.microsoft.com/en-us/library/gg334317.aspx
http://msdn.microsoft.com/en-us/library/gg328073.aspx
http://msdn.microsoft.com/en-us/library/gg309433.aspx
For example, if the 'Email' field has value then the custom will be enable otherwise it will disable.
/RibbonDiffXml/RuleDefinitions/EnableRules/EnableRule/
<EnableRule Id="DNS.contact.form.EmailValue.EnableRule">
<ValueRule Field="email" Value="null" InvertResult="true"/>
</EnableRule>
<ValueRule Field="email" Value="null" InvertResult="true"/>
</EnableRule>
EnableRule for mulitple fields, use 'OrRule', for example
<EnableRule Id="DNS.contact.form.EmailValue.EnableRule">
<OrRule>
<Or>
<ValueRule Field="email" Value="null" InvertResult="true"/>
</Or>
<Or>
<ValueRule Field="leadsourcecode" Value="810520005"/>
</Or>
</OrRule>
</EnableRule>
<OrRule>
<Or>
<ValueRule Field="email" Value="null" InvertResult="true"/>
</Or>
<Or>
<ValueRule Field="leadsourcecode" Value="810520005"/>
</Or>
</OrRule>
</EnableRule>
EnableRule only works with Equal(=) condition, for different conditions (not equal) use 'InvertResult' attribute.
Refer the above id in the following location /RibbonDiffXml/CommandDefinitions/CommandDefinition/EnableRules
<EnableRule Id="Sample.account.form.CheckFaxValue.EnableRule"/>
CustomRule - call a javascript function based on the result.
<EnableRule Id="DNS.contact.form.EmailValue.EnableRule">
<CustomRule FunctionName="DisableReportButton" Library="$webresource:dns_JavaScript/reports.js" Default="true" />
</EnableRule>
<CustomRule FunctionName="DisableReportButton" Library="$webresource:dns_JavaScript/reports.js" Default="true" />
</EnableRule>
http://msdn.microsoft.com/en-us/library/gg334317.aspx
http://msdn.microsoft.com/en-us/library/gg328073.aspx
http://msdn.microsoft.com/en-us/library/gg309433.aspx
Labels:
crm_int,
customization,
CustomRule,
dynamics 2011,
EnableRule,
Library,
ms dynamics crm,
OrRule,
ribbon,
RibbonDiffXml,
rule,
ValueRule
Friday, May 3, 2013
Customize the CRM Ribbon
Ribbon used to perform actions and add custom controls.
Displays actions that are relevant to each area of the application as users access them.
Dynamics CRM provides RibbonDiffXml definitions for all ribbons in the application for you to customize.
You can access the default ribbon definitions in the SDK\SampleCode\CS\Client\Ribbon\ExportRibbonXml\ExportedRibbonXml folder - this will generate all the entities ribbons
<RibbonDiffXml>
<CustomActions>
<CustomAction Id="Mscrm.DashboardTab.Favorite.CustomAction" Location="Mscrm.DashboardTab.Groups._children" Sequence="101">
<CommandUIDefinition>
<MaxSize Id="Mscrm.DashboardTab.Favorite.MaxSize" GroupId="Mscrm.DashboardTab.Favorite" Sequence="101" Size="LargeMedium" />
<Scale Id="Mscrm.DashboardTab.Favorite.Scale.Popup" GroupId="Mscrm.DashboardTab.Favorite" Sequence="3001" Size="Popup" />
<Group Id="Dns.DashboardTab.Favorite" Command="Mscrm.Enabled" Template="Mscrm.Templates.Flexible2" Sequence="100" Title="$LocLabels:Mscrm.DashboardTab.Favorite.TitleText" Description="$LocLabels:Mscrm.DashboardTab.Favorite.DescriptionText">
<Controls Id="Mscrm.DashboardTab.Favorite.Controls">
<Button Id="Mscrm.DashboardTab.Favorite.EmpApp" Command="Mscrm.DashboardTab.Favorite.EmpApp.Command" Sequence="201" ToolTipTitle="$LocLabels:Mscrm.DashboardTab.Favorite.EmpApp.LabelText" LabelText="$LocLabels:Mscrm.DashboardTab.Favorite.EmpApp.LabelText" ToolTipDescription="$LocLabels:Mscrm.DashboardTab.Favorite.EmpApp.Description" TemplateAlias="isv" />
</Controls>
</Group>
<Tab Id="Mscrm.Isv.Global" Command="Mscrm.Isv.Global" Description="Place" Title="Place" Sequence="2000">
<Scaling Id="Mscrm.Isv.Global.Scaling">
<MaxSize/ />
<Scale/ />
</Scaling>
<Groups Id="Mscrm.Isv.Global.Groups">
<Group/>
</Groups>
</Tab>
</CommandUIDefinition>
</CustomAction>
<HideCustomAction />
</CustomActions>
<Templates>
<RibbonTemplates Id="Mscrm.Templates"></RibbonTemplates>
</Templates>
<CommandDefinitions />
<RuleDefinitions />
</RibbonDiffXml>
Sunday, April 28, 2013
Dynamics CRM Application Navigation Using Site Map
The site map is xml included in a solution’s customizations file. Create a solution specifically for site map and application ribbon changes.
Use XML Notepad 2007 to edit XML
The default site map that you export does not include any of the following elements: Title, Titles, Description, or Descriptions. Dynamics CRM doesn’t require these elements for the six default application areas, but they are required for new areas. The Title, Titles, Description, and Descriptions elements apply to the Area, Group, and SubArea elements.
The Descriptions elements appear only in the Outlook client; the Titles elements appear in both the web and Outlook clients.
http://<crmserver>/<organizationname>/tools/solution/import/SolutionImportWizard.aspx.
Always export the latest site map and create a backup copy before making any edits.
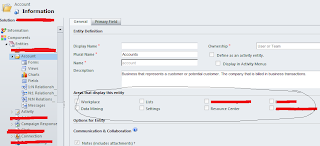
Entity Display Areas

<SiteMap>
<SiteMap>
<Area>
<Group>
<SubArea/>
<Privilege/>
</SubArea>
</Group>
</Area>
</SiteMap>
</SiteMap>
<SiteMap>
<Area>
<Group>
<SubArea/>
<Privilege/>
</SubArea>
</Group>
</Area>
</SiteMap>
</SiteMap>
Use XML Notepad 2007 to edit XML
The default site map that you export does not include any of the following elements: Title, Titles, Description, or Descriptions. Dynamics CRM doesn’t require these elements for the six default application areas, but they are required for new areas. The Title, Titles, Description, and Descriptions elements apply to the Area, Group, and SubArea elements.
The Descriptions elements appear only in the Outlook client; the Titles elements appear in both the web and Outlook clients.
http://<crmserver>/<organizationname>/tools/solution/import/SolutionImportWizard.aspx.
Always export the latest site map and create a backup copy before making any edits.
Entity Display Areas

Monday, April 22, 2013
CRM Form Customization JavaScript
SAVE and Close Function
Save - Xrm.Page.data.entity.save();
Save & Close - Xrm.Page.data.entity.save("saveandclose");
Save & New - Xrm.Page.data.entity.save("saveandnew");
Close - Xrm.Page.ui.close();
Save - Xrm.Page.data.entity.save();
Save & Close - Xrm.Page.data.entity.save("saveandclose");
Save & New - Xrm.Page.data.entity.save("saveandnew");
Close - Xrm.Page.ui.close();
dns_JavaScript/Food.js
Read text box value
Xrm.Page.data.entity.attributes.get("dnsb_foodreason").getValue();
var fName = Xrm.Page.data.entity.attributes.get("fName").getValue();
check value is null or not
if (fName==null) fName = "";
Read text box value
Xrm.Page.data.entity.attributes.get("dnsb_foodreason").getValue();
var fName = Xrm.Page.data.entity.attributes.get("fName").getValue();
check value is null or not
if (fName==null) fName = "";
Get html element value
var plFS = document.getElementById("dns_foodstatus");
Labels:
alignment,
button,
close,
crm javascript,
crm save,
dynamics 2011,
footer,
header,
hide,
javascript,
jumbselector,
message bar,
ms dynamics crm,
navigation,
picklist,
ribbon,
save,
title,
top bar
Subscribe to:
Posts (Atom)


